
If your reviewing your options of deck sanding vs chemical stripping agents your deck has most likely suffered from years of neglect and is showing advanced signs of wear from the harsh UV rays mixed with foot traffic and general use.
If you visit your local paint store or hardware shop you will be advised best practice will be to remove your existing coatings prior to doing any form of oiling or staining of your deck.
Which of course leads you here!
Please refer to the below 3 different examples of the category’s that externals timbers will generally fall under followed by suggested treatments to restore your timber.
In almost all instance sanding back your deck to bare timber will give you the best results when compared to stripping agents but the cost factor and job site surrounds will need to be taken into consideration when making your final decision.
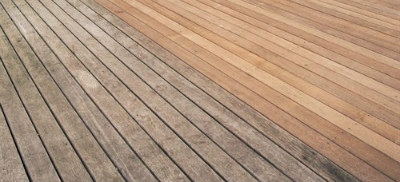
Weathered Merbau deck after high pressure clean and acid wash
Scenario 1. Old deck – No sign of any existing coatings – decking timbers are now grey and has signs off mold/stains from pots etc.
More often than not, the decking will respond very well to a combination of high-pressure treatments coupled with various chemical treatments.
Your first goal should be to clean your timbers ideally using some sort of Alkaline cleaning agent ie Mixing 500 grams of Napisan or other Sodium per carbonate with 10 L of Warm water will do the trick plus save you $50 from having to buy made to purpose products. Simply broom out the solution, let dwell for 10 minutes and then hose/high pressure clean away. *Always follow up with a acid treatment* The above treatment will lift urine, alcohol, bird droppings, and even help remove traditional turps based decking oils.
Assuming you ran with the degreasing treatment above, your timbers will now be quiet dark and in need of a brightening treatment. I encourage you to make up a Oxalic acid solution with water. We personally buy a 100% concentrated solution and make up our own mixs but this can be quiet dangerous for DIY so i encourage you to go to your local hardware and buy a “deck cleaner” product that says active ingredient Oxalic acid with a 10% Ratio. Don’t be fooled by the variance in the oxalic acid deck clean products with different colours and huge variants in price this is simply a marketing ploy. For legal reasons I wont take names but i will say that a large conglomerate owns 80% of the products on these shelves so please do your own research and support Australian when you can.
Re correct usage of the Oxalic acid decking treatment – Follow the instructions on ratios from the product labeling. Be sure after applying the acid that it does not dry into the timber, to achieve this keep misting with the hose while it dwells. Once its time to remove the product be sure to wet down any grass, plants, render or pavers to prevent potential bleaching.
The acid treatment will help act as a timber brightener and neutralize mold mildew that has set in the timber.
Special Tip 1 – Try to use no more than 1000 – 1500 PSI High pressure washers to reduce the chance of ripping apart your timber*)
Special Tip 2 – When using your high pressure cleaner set the unit to a 25 degrees fan and keep the wand tip 1 foot away at all times to ensure you don’t damage your timbers.

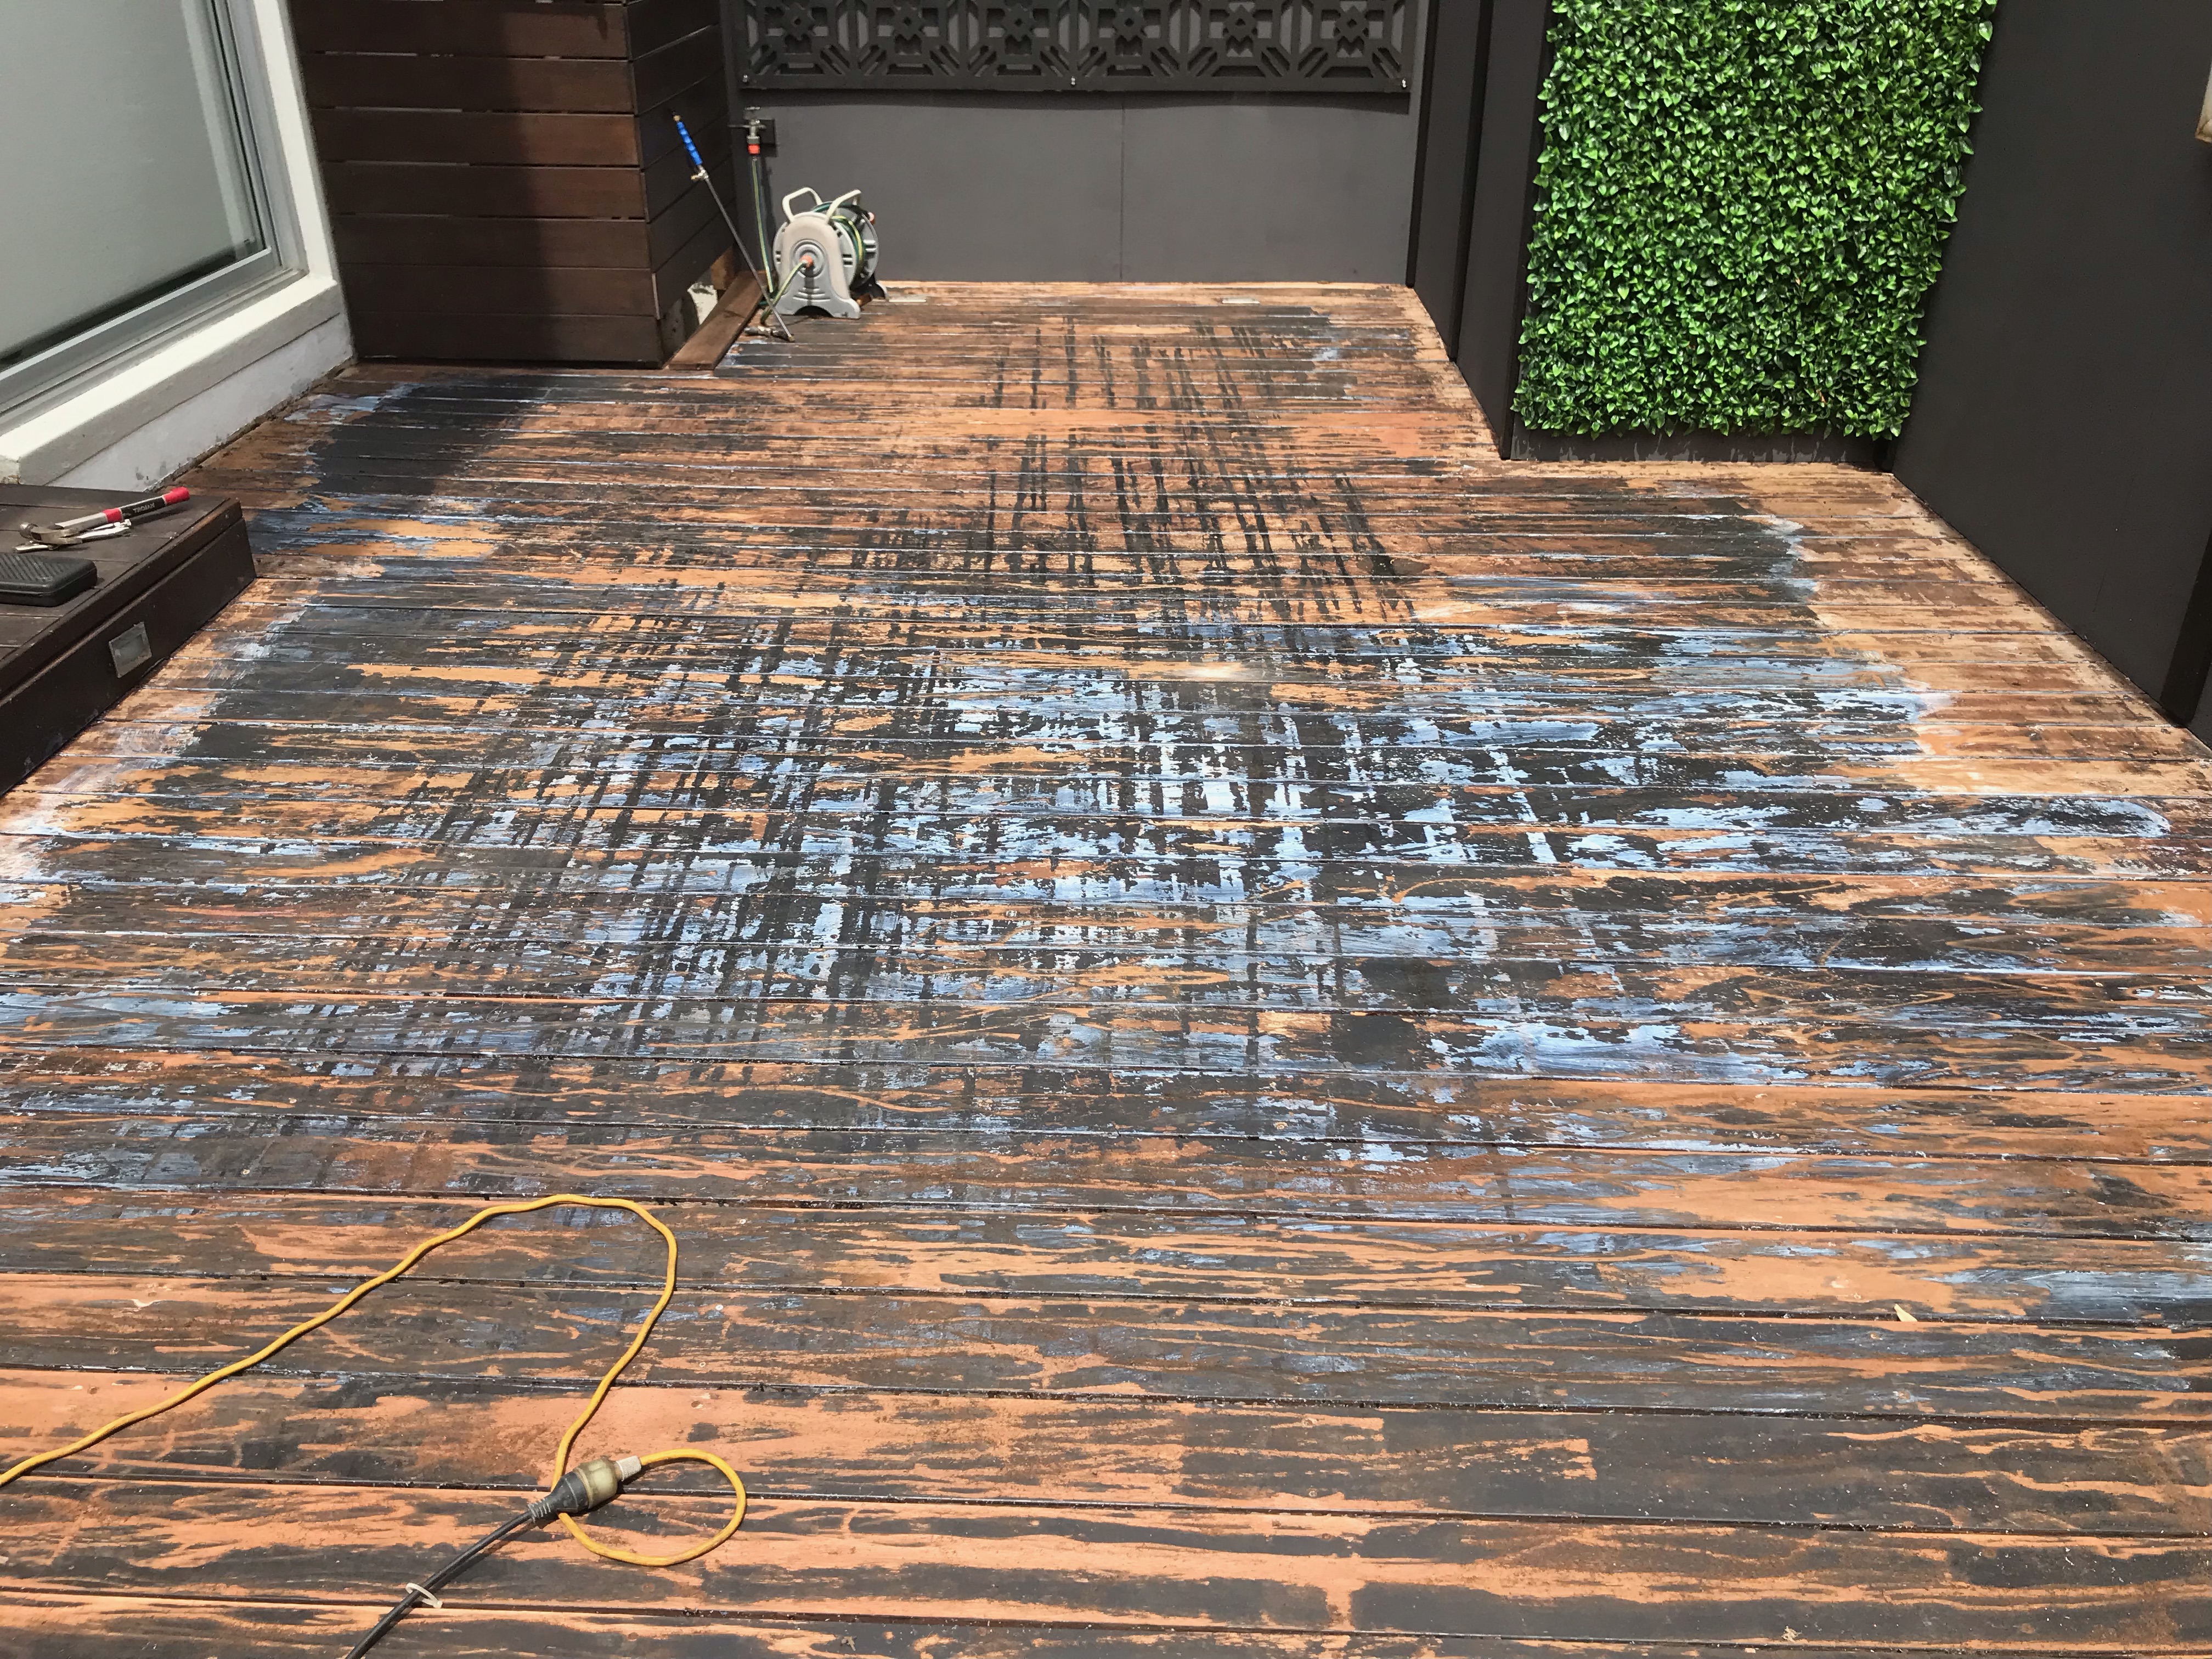
example of patchy decking coating
Scenario 2. You have no idea what has been used in the past but the existing coatings are patchy in areas.
Depending on if you have sensitive surfaces surrounding the deck such as render walls and the likes will determine if strippers are even an option at this point. If you render free we recommend purchasing a deck stripping agent and trialing the product on an area of your deck that still has a buildup of existing coatings. If you are satisfied with the appearance of the timber after the stipping agent, followed by an acid wash, you are on the right path.
If the stripping agent does not have the desired effect on stripping the existing coating the deck MUST be sanded back to reveal raw timber – its usually at this point that we would run with a series of chemical treatments to lift contaminants from the timber before putting down any protective coatings. (CAUTION – Make sure you remove the stripping agent and neutralize with an acid wash so you don’t damage your timber)
Here is a recent DIY example of a decking coating stripping agent used by a client who reached out to us for help. Unfortunately this client had spend hundreds of dollars on toxic chemicals and also had a failed attempt at sanding the deck before finally throwing in the towel and reaching out for our help. This is why we strongly encourage you test on a small area to see if your biting of more than you can chew. Believe it or not these mishaps happen quiet often when clients have attempted to go the DIY route. This client lost 2 weekends and over $1000 in materials to then have to have to pay to have it all done professionally so please weigh up the risk/reward and test small before committing to the job of deck restoration.
Scenario 3. The existing coating is cracking/peeling
In this scenario this tells us some form of acrylic or film based coating like Sikkens, Integrain or Floods Spa and deck has been used – in almost all instances stripping agents is a waste of time and sanding is most definitely going to yield the best results.
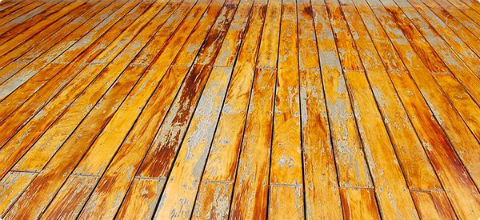
Flaking deck coating in need of a good deep sand
Scenario 4. New deck – You have recently had a deck built
Your timbers should look to be in great condition, which is to be expected with a new build. Generally when a new deck has been built, its advised that the deck be left to weather for 6 – 8 weeks. This allows the deck to have a chance to leach out its tannin (natural oils).
We find that in instances where the house has eaves or if the deck is built undercover ie alfresco build, as the timbers will never get a chance to weather due to lack of exposure to the sun/rain. To mimic this natural process I would recommend hosing down the decking timbers to push this process along, particularly in undercover areas.
Before committing to any form of treatment of your new build I strongly encourage you to inspect the build to make sure your deck build allowed for a minimum of 5 MM spacings on all of your boards. IF the timbers have not been laid correctly the build is doomed to fail in a few years as it will suffer from poor ventilation which will lead to condensation – > mold issues -> sub floor rot and $$$ in repairs. So please spend the time and inspect the build and rectify any spacing issues now before proceeding.
Deck builds all good and your happy to proceed ? Ok great. With all new builds we like the give the timbers a light sand with a 80 grit to open up the grain. This will also allow you to remove scuff marks, bur around screws and remove any mill glazing.
Next step is to run with the prep work outlined in Scenario 1 with a degreaser/acid treatment.
If your confused about any of the above please feel free to reach our to us, send in some pics and I’ll do my best to get you on tack.
Final Rehash
– Always trial stripping products on a small area before using on the whole deck to test their effectiveness.
– Acid wash should always be a final step of preparation after sanding or using stripping agents
– Sanding will give the best results!
We hope you have found this article helpful for a general diagnosis of your decking timbers – If you have any further questions don’t hesitate to ask!
Why Guess When You Can Ask Someone Who’s Done 1,000+ Decks? →
Quick photo, honest answer, same-day quote.
Can’t Decide? Send Us a Photo — We’ll Tell You →
Every deck is different. We’ll tell you exactly what yours needs. Free, no obligation.
If you would like a FREE QUOTE call us on 1300 363 478 or submit your details online.
We service all over Victoria but have been known to do jobs interstate if enough work is involved.
If you have a new Spotted Gum decking to be oiled you may find this article of use to you.
Or how to apply for external access safety maintenance for NDIS participants

 ★★★★★ 5.0 from 187 reviews
Not Sure What Your Deck Needs? We’ll Tell You
Send us a few details. Most quotes delivered same day.